viernes, 30 de agosto de 2013

Decorando con conchas - Decorating with shells

Rereregreen
Rereregreen


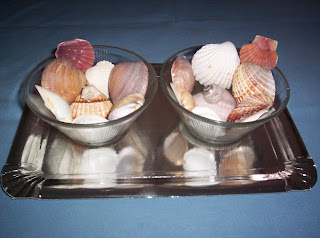
Para adornar una mesa, he utilizado unas conchas que he recogido en la playa, un par de cuencos de cristal y una bandeja color plata. Es algo sencillo pero refrescante, ¿verdad?

Rereregreen
Rereregreen


To decorate a table, I have used some shells that I have gathered in the beach, a couple of glass bowls and a tray in silver color. It is something simple but refreshing, isn't it?
miércoles, 28 de agosto de 2013

Marcapáginas con pegatinas de Jip y Janneke - Bookmark with stickers of Jip and Janneke


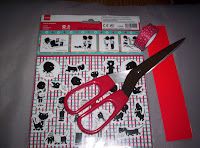
Para mi marido, he hecho un Marcapáginas con un par de pegatinas de Jip y Janneke. Son dos personajes de Países Bajos, que aparecen en cuentos para niños. Estas historias fueron escritas por Annie M.G. Schmidt e ilustradas por Fiep Westendorp. Para hacer este Marcapáginas, he usado un trozo de cartulina roja de 17,5 cm de largo por 3,5 cm de ancho. Después, lo he forrado con cinta washi tape en la parte trasera y decorado delante con dos pegatinas de Jip y Janneke. La primera foto muestra los materiales, la segunda la parte trasera y la última la parte delantera del marcapáginas.

Rereregreen
Rereregreen


 For my husband, I have made a Bookmark with a couple of stickers of Jip and Janneke. They are two characters from the Netherlands, who appear in stories for children. These stories were written by Annie M.G. Schmidt and illustrated by Fiep Westendorp. To make this Bookmark, I have used a piece of red cardboard of 17,5 cm of length for 3,5 cm of width. Later, I have covered it with washi tape in the back and decorated in front with two stickers of Jip and Janneke. First photo shows the materials, the second one the back and the last one the front of Bookmark.


Rereregreen
Rereregreen
Rereregreen
Rereregreen

lunes, 26 de agosto de 2013

Crear un Abanico reciclando Palitos de Polo - To create a Fan recycling some Popsicle Sticks

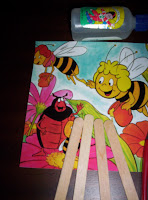
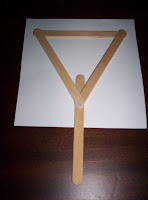
He reciclado cuatro palitos de polo y una cartulina con una ilustración de la Abeja Maya, para hacer un abanico para mi ahijado. Solo hay que lavar los palitos, dejar que se sequen y luego pegarlos con pegamento especial para madera detrás de la cartulina de la Abeja Maya. Así ha quedado este abanico para mi ahijado por detrás y por delante.


Rereregreen
Rereregreen
Rereregreen
Rereregreen
Rereregreen
Rereregreen


I have recycled four small popsicle sticks and a cardboard with an illustration of Maya The Bee, to make a fan for my godson. It is only necessary to wash the sticks, allow them to dry and then to stick them with special glue for wood behind the cardboard of the Maya The Bee. This is the fun for my godson in a back photo and a front photo.

sábado, 24 de agosto de 2013

Decorando vasos de cristal de yogur - Decorating glasses of crystal of yogurt

Rereregreen
Rereregreen


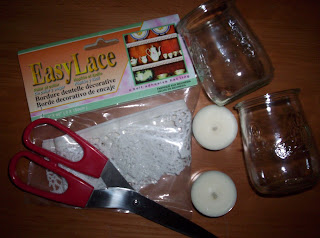
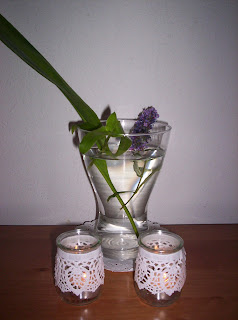
He decorado un par de vasos de cristal de yogur usando una puntilla adhesiva de unos 18 cms de largo. Después, he puesto en su interior unas velitas y he colocado ambos junto a un jarrón. ¿Os gusta?


Rereregreen
Rereregreen


I have decorated a couple of glasses of crystal of yogurt using an adhesive lace of 18 cms of length. Later, I have put in its interior a tea light and I have placed both of them close to a vase. Do you like them?

domingo, 18 de agosto de 2013

Servilleros de Cartulina - Napkin rings of cardboard

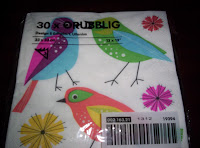
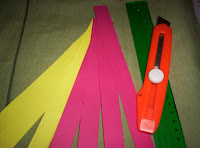
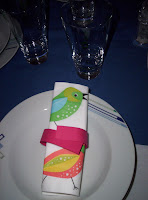
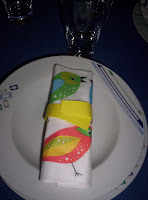
Quería decorar una mesa para una comida familiar de forma divertida y económica. Entonces, he pensado en hacer unos servilleteros de cartulina, son rápidos y baratos. Es necesario cortar unas tiras de cartulina de 22 cm de largo por 2 cm de ancho. Después, se hace con el cutter una incisión a unos 3 cm desde el borde de un 1 cm de largo. Por último, se mete la esquina de la tira en la incisión y dentro una servilleta alegre como la de la serie Orubblig, diseñadas por S. Edholm y L. Ullenius de Ikea. He hecho servilleteros en color amarillo para los chicos y en color rojo para las chicas. Estos son mis servilleteros.


Rereregreen
Rereregreen
Rereregreen
Rereregreen


Rereregreen
Rereregreen

Rereregreen
Rereregreen


 I wanted to decorate a table for a family meeting in a way economic and funny. Then, I have thought to make some napkin rings of cardboard, they are quick and cheap. It is necessary to cut a few strips of cardboard of 22 cm of length for 2 cm of width. Later, an incision is done by the craft knife to approximately 3 cm from the edge of a 1 cm of length. Finally, the corner of the strip gets into the incision and inside a cheerful napkin as this of the serie Orubblig, designed for S. Edholm and L. Ullenius by Ikea. I have made napkin rings in yellow color for the boys and in red color for the girls.These are my napkin rings.


viernes, 16 de agosto de 2013

Regalo de Verano - Gift of Summer

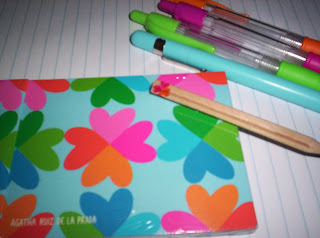
He comprado una pequeña agenda para mi prima de una de mis diseñadoras Españolas favoritas, Agatha Ruiz de la Prada. Me gustan sus diseños sencillos y llenos de color. En un lápiz, he pintado los motivos de la agenda para que quede bonito.


Rereregreen
Rereregreen


I have bought a small agenda for my cousin made of one of my favorites Spanish designers, Agatha Ruiz de la Prada. I like her simple designs full of color. In a pencil, I have painted the motives of the agenda in order that it remains nice.

martes, 13 de agosto de 2013

Buena Suerte - Good-Luck

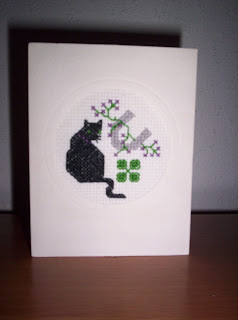
Hoy, es Martes 13, y en España se considera día de la mala suerte, mientras que en otros paises se considera este dia el Viernes 13. Para prevenir que pueda venir la mala suerte, mi amiga Kimberly de Reino Unido, me regaló una postal hecha a punto de cruz, con símbolos para atraer la buena suerte: un gato negro, una herradura, un trébol...¡¡Suerte para todos!!

Rereregreen
Rereregreen

Today, it is 13th Tuesday,  and in Spain it is considered the day of bad luck, whereas in other countries it is considered this day on Friday, the 13th. To prevent that the bad luck could come, my friend Kimberly of United Kingdom, she gave me a postcard made of cross stitcht with symbols whose can to attract the good luck: a black cat, a horse-shoe, a clover ... luck for all!!

domingo, 11 de agosto de 2013

Redecorando una caja con washi tape - Redecorating a box with washi tape

Rereregreen
Rereregreen
Quería redecorar una caja que uso para llevar mi barra de labios en el bolso. He pensado que hacerlo con washi tape, era una buena solución. Con ayuda de un par de tijeras y un cutter, he logrado un buen resultado. Os lo muestro, aquí.


Rereregreen
Rereregreen

I wanted to redecorate a box that I use to keep my lipstick inside of my handbag. I have thought that to do it with washi tape, it was a good solution. With the help of a pair of scissors and a craft knife, I have achieved a good result. I show it to you, here.

jueves, 8 de agosto de 2013

Flores de papel de seda - Flowers of tissue paper

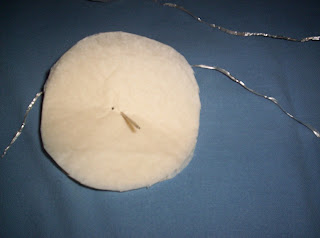
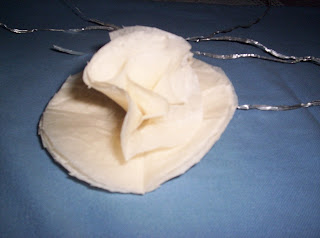
Tenía un trozo de papel de seda que me dieron en una tienda de perfumes, para reutilizarlo, he hecho unas flores. Es fácil y rápido. Solo necesitas alambres de unos 30 cms de largo, un círculo para que sirva de plantilla (he usado una tapa de yogurt de 500 grs, el cuál tiene 9,5 cm de diámetro), un par de tijeras, una aguja gruesa y un lápiz. Primero, he doblado el papel de seda hasta tener 8 capas. Después he colocado el círculo y he dibujado su contorno con el lápiz. He cortado ese círculo y he hecho dos agujeros con la aguja. Se doblan las hojas una por una para hacer los petalos y por último se introduce el alambre por cada agujero y se enrolla sobre sí mismo. Aquí os muestro el proceso y mis flores.

Rereregreen
Rereregreen

Rereregreen
Rereregreen

Rereregreen
Rereregreen

Rereregreen
Rereregreen

Rereregreen
Rereregreen


I had a chunk of tissue paper that had given me in a shop of perfumes, to reuse it, I have made a few flowers. It is easy and quick. You just need some wires of approximately 30 cms of length, a circle in order that it will be used as template (I have used a lid of yogurt of 500 grs, which one has 9,5 cm of diameter), a pair of scissors, a thick needle and a pencil. First, I have folded the tissue paper up to having 8 layers. Later I have placed the circle and have drawn his contour with the pencil. I have cut this circle and have done two holes with the needle. The layers are folded one for one to do the petals and finally the wire is introduced for every hole and coiled on itself. Here I show you the process and my flowers.

domingo, 4 de agosto de 2013

Reutilizando Etiquetas Adhesivas para crear Postales de Cumpleaños - Reusing Adhesive Labels to create Birthday Cards

Rereregreen
Rereregreen


He reutilizado unas cartulinas en color verde y unas Etiquetas Adhesivas para crear dos Postales de Cumpleaños. Una es para mi amiga Sofía y otra para mi abuela. ¿Os gustan?


Rereregreen
Rereregreen


I have reused a couple of cardbs in green color and a couple of Adhesive Labels to create two Birthday cards. One is for my friend Sofía and other one for my grandmother. Do you like them?

Translate