Mostrando entradas con la etiqueta Accesorios para disfraz - Accesories for a fancy dress. Mostrar todas las entradas

viernes, 21 de febrero de 2020

Sencillo disfraz Egipcio para niños - Simple Egyptian Costume for children

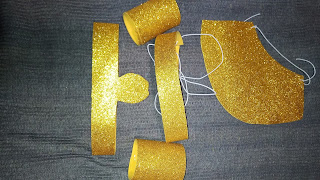
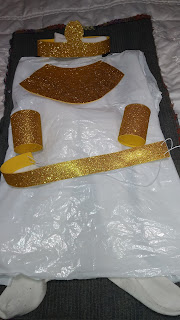
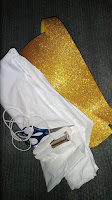
En la Escuela de mi hija, hicimos un disfraz fácil de Egipcia hace unas semanas. Los materiales que hemos utizado son: un par de tijeras, una grapadora, una bolsa de plástico blanca de 30 litros, goma elástica blanca tipo cordón y una lámina de goma eva dorada. La plantilla para realizar la banda de la cabeza es de la página web de first palette (ver enlace abajo), el cuello, el cinturón y los brazaletes los hemos hecho un poco adaptados al cuerpo de la niña o niño sin plantilla. Para unir la banda he usado grapas y también para los brazaletes. para el cuello y el cinturón los he adaptado usando la goma elástica. He hecho tres cortes para los brazos y el cuello en la bolsa y cortado la parte de la tira superior, se le da la vuelta porque se va a usar como túnica. El traje se completa con leotardos y jersey blanco de cuello alto.
Este es el resultado para crear este disfraz sencillo.
Banda Egipcia


Rereregreen
Rereregreen
Rereregreen
Rereregreen


Rereregreen
Rereregreen


Rereregreen
Rereregreen


At my daughter’s school, we made an easy Egyptian costume a few weeks ago. The materials we have used are: a pair of scissors, a stapler, a white plastic bag of 30 liters, white elastic cord and a sheet of golden eva foam. The template for making the headband is from the first palette website (see link below), the neck, the belt and the bracelets have been made a little adapted to the body of the girl or boy without a template. To join the band I used staples and also for the bracelets. for the neck and the belt I adapted them using the elastic cord. I have made three cuts to the arms and neck, I have cut the strip and I have turned the bag, because it has to be worn as a tunic. The suit is completed with leotards and white turtleneck jersey. 
This is the result to create this simple costume.
Egyptian headband


jueves, 19 de diciembre de 2019

Gorros de Elfos - Elves Hats

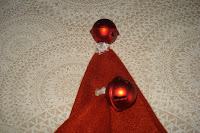
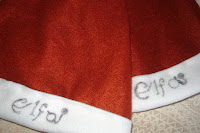
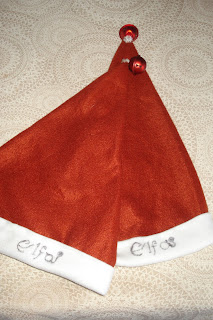
Los Elfos están de moda ahora más que otros años aquí en España, de hecho, una de las cadenas más importantes comerciales Española, "El Corte Inglés", en sus anuncios de Navidad muestra una historia de Elfos. Yo he reciclado, un par de gorros de publicidad de una bebida, para convertirlos en gorros de Elfos. He doblado y cosido el borde del gorro hacia arriba y he escrito la palabra "Elfo y Elfa". En la punta he cosido un cascabel. Lo hice para dos niños y les gustó mucho.


Rereregreen
Rereregreen
Rereregreen
Rereregreen


Rereregreen
Rereregreen

Rereregreen
Rereregreen


Elves are trendy now more than other years here in Spain, in fact, one of the most important Spanish Commercial Store, "El Corte Inglés", in their Christmas advertisements have shown a little story about Elves. I have recycled a couple of advertising caps from a drink, to turn them into elf hats. I have folded and sewn the edge of the hat up and I have written the word "Elf boy and Elf girl". At the tip I have sewn a bell.  I made them for two kids and they really liked it.

domingo, 24 de febrero de 2019

Disfraz de estrella con goma eva y espumillón - Star Costume with eva foam and tinsel

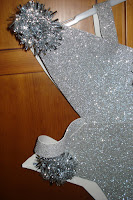
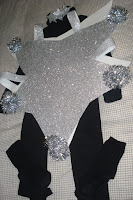
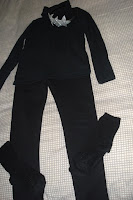
He hecho un Disfraz de Estrella con la ayuda de dos madres del Colegio de mi hija, y hemos usado materiales sencillos. Los materiales son goma eva plateada, pistola de silicona caliente, un par de tijeras, una grapadora, papel de embalaje y una cinta de espumillón plateado. Primero, hemos usado el papel de embalaje para hacer un molde de una estrella de cinco puntas, dejando una punta hacia abajo en dirección a los pies de la persona que lleva el disfraz, para mayor comodidad. Segundo, hemos cortado dos formas de estrellas: delantera y trasera para hacer este traje. Cómo la goma eva viene en láminas cuadradas de 60 x 60 cm, es necesario usar una lámina y media para cada parte delantera y trasera, respectivamente. Tercero, hemos cortado una tira para unir esta lámina y media, que hace la forma de la estrella. Cuarto, hemos cortado dos tiras para los tirantes que se sujetan en los hombros y dos tiras para sujetar los laterales. Estas tiras se sujetan con grapas. Quinto, hemos hecho una bola con unos trozos de cinta de espumillón y se grapa cada bola a cada una de las puntas de la estrella delantera. No es necesario para la parte trasera. El disfraz se completa llevando una diadema en el cabello, (ver entrada anterior), un jersey negro de cuello alto, un par de pantalones negros, un par de calcetines y un par de zapatos negros. Os muestro las fotos de este sencillo disfraz.


Rereregreen
Rereregreen


Rereregreen
Rereregreen


Rereregreen
Rereregreen
Rereregreen
Rereregreen


Rereregreen
Rereregreen
Rereregreen
Rereregreen


I have made a Star Costume with the help of two mothers of my daughter's school and we have used simple materials. The materials are silver eva foam, a hot silicone pistol, a couple of scissors, a stapler, packaging's  paper and a silver tinsel. First, using the packaging paper we have done a pattern of a star of five points, leaving a point down towards the feet of the person who takes the costume, for major comfort. Second, we have cut two shapes of stars: front and back to make this suit. How the eva foam comes in square sheets of 60 x 60 cm, you need a sheet and a half for every front and back part, respectively. Third, we have cut a strip to join this sheet and a half, which does the form of the star. Fourth, we have cut two strips for the braces that hold themselves in the shoulders and two strips to hold the sides. We join these strips with staples. Fifth, we have done a ball using few chunks of tinsel and is stapled every ball to each one of the points of the front star. It is not necessary do it for the back part. The costume is completed taking a hairband (see previous entry), a black jersey of high neck, a pair of black trousers, a pair of socks and a pair of black shoes. I show you the photos of this simple costume. 
lunes, 18 de febrero de 2019

Diadema de estrella - Stars Hairband

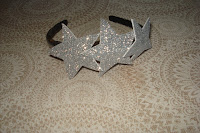
Hoy, quisiera mostraros que he hecho una diadema con tres estrellas como accesorio de un disfraz de estrella. He usado un trozo de goma eva plateado, un par de tijeras, una pistola de silicona caliente y esmalte de uñas plateado. He recortado tres estrellas, después las he pegado con la pistola de silicona  caliente a la diadema.  Y por último he pintado la diadema con el esmalte de uñas.


Rereregreen
Rereregreen
Rereregreen
Rereregreen


Rereregreen
Rereregreen

Rereregreen
Rereregreen


Today, I would like to show you that I have done a hairband with three stars as accessory of a costume of star. I have used a chunk of silver Eva foam, a couple of scissors, a hot silicone pistol and a silver nail polish. I have cut three stars away, later I have stuck them with the hot silicone pistol to the hairband. And finally I have painted the hairband with the nail polish.

viernes, 15 de febrero de 2019

Reciclar tela de paraguas para crear Capa de Batman - Recycling a fabric of an umbrella to create a Batman's Cape

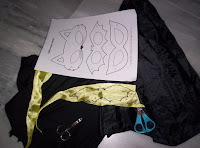
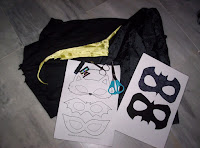
He reciclado una tela de un paraguas negro para crear una Capa de Batman. Primero, he cortado a lo largo la tela para que tenga una abertura. Segundo, he cosido una cinta a cada lado (izquierdo y derecho) para poder atarla al cuello. Tercero, he usado un trozo de tela amarilla y unas máscaras de Kizclub para crear un murciélago. Lo he recortado y cosido con hilo negro. Cuarto, he hecho una máscara con cartulina. Este es el resultado.
Máscaras de kizclub


Rereregreen
Rereregreen
Rereregreen
Rereregreen


Rereregreen
Rereregreen

I have recycled a fabric of a black umbrella to create a Batman's Cape. First, I have cut lengthways the fabric in order that it has an opening. Second, I have sewed a ribbon to every side (left and right) to be able to tie it to the neck. Third, I have used a chunk of yellow fabric and a few Kizclub's masks to create a bat. I have cut away and sewing with black thread. Fourth, I have done a mask with cardboard. This is the result.
Kizclub Masks

viernes, 26 de octubre de 2018

Capa de Superman reciclando tela de paraguas - Cape of Superman recycling fabric of an umbrella

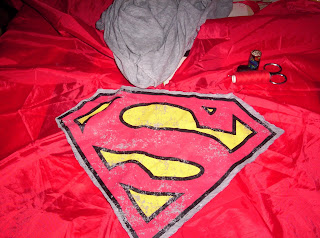
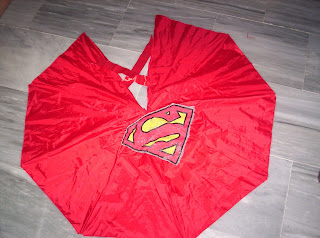
He reciclado la tela de un paraguas rojo y una camiseta con el logotipo de Superman para hacer una capa de este Héroe, para mi sobrino. Sólo he recortado el logotipo y lo he cosido con hilo rojo a la capa. Después, he cosido dos tiras de lazo rojo para que él pueda atar la capa a su cuello. Este es el resultado de la Capa de Superman.

Rereregreen
Rereregreen

Rereregreen
Rereregreen

Rereregreen
Rereregreen
I have recycled the fabric of a red umbrella and a t-shirt with the Superman logo to make a cape of this hero, for my nephew. I have just cut out the logo from the t-shirt and I have sewn it using red thread to the cape. Later, I sewed up two strips of red ribbon, so he can tie around of his neck this cape. This is the result of the Superman's Cape.

viernes, 18 de mayo de 2018

Un Caballito como accesorio para un disfraz y para jugar - A little horse as accesory for a fancy dress or playing

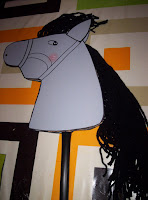
Hace unos meses, hice este caballito para mi hija como parte de una actividad de su Colegio junto a otras Mamás. Ahora, me gustaría mostrarlo porque, puede ser un complemento para un disfraz de Dama o de Caballero de la Edad Media en un juego, o simplemente para divertirse en casa y al aire libre.
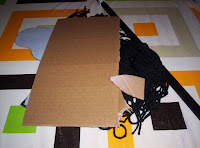
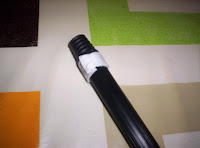
Necesitas un palo de recogedor de largo de 70 a 80 cms (según fabricante), este es de 73 cms, planchas de cartón para dar rigidez, cartulina gris, lana negra, pegamento, rotulador negro permanente, cinta adhesiva de doble cara y pistola de silicona caliente.
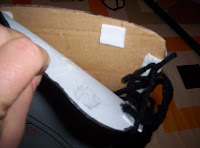
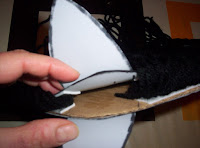
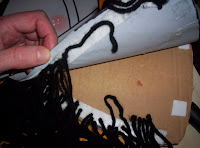
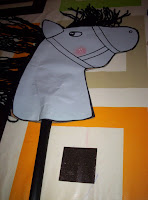
Primero, haces una plantilla con la plancha de cartón del perfil del caballo y de la oreja. Después con esa plantilla haces los dos perfiles (derecho e izquierdo) del caballo. Con trozos de cinta adhesiva de doble cara, vas pegando las orejas y perfiles del caballo poniendo cartón corrugado entre las dos partes de la cartulina gris. Con esa misma cinta adhesiva de doble cara pegas trozos de lana que serán las crines del caballo. Dibujas el rostro del caballo ojos, brida, nariz y bordes del perfil usando tu rotulador negro permanente. Como podéis ver, esté lleva un poco de colorete, (idea de María del Carmen, una mamá del Cole). Y cómo último paso, pones otro trozo de cinta adhesiva para pegar el palo del recogedor. Por último, para que se quede bien fijo, rematas el interior y todas las partes usando la pistola de silicona.
Aquí tenéis las fotos de perfil izquierdo y derecho de un caballo lindo para los niños. Ahora, ¡a jugar!


Rereregreen
Rereregreen
Rereregreen
Rereregreen


Rereregreen
Rereregreen

Rereregreen
Rereregreen

Rereregreen
Rereregreen

Rereregreen
Rereregreen

Rereregreen
Rereregreen

Rereregreen
Rereregreen

Rereregreen
Rereregreen


Rereregreen
Rereregreen
Rereregreen
Rereregreen


Few months ago, I made this little horse for my daughter as part of an activity of her School together with other Moms. Now, I would like to show it because, it can be a complement for a disguise of Lady or of Knight of the Middle Ages in a game, or simply to have fun at house and outdoors. 
You need a dutspan's stick of length from 70 to 80 cms (according to manufacturer), this one is of 73 cms,  some of corrugated cardboard to give rigidity, grey cardboard, black wool, glue, black permanent felt-tip pen, adhesive tape of double face and a pistol of hot silicone. 
First, you do a template with the corrugated cardboard of the profile of the horse and of the ear. Later with this template, you make both profiles (right and left-handed) of the horse. With some pieces of adhesive tape of double face, you are sticking the ears and profiles of the horse puting the corrugated cardboard between the two parts of grey cardboard. With the same adhesive tape of double face you stick chunks of wool that will be the manes of the horse. You draw the face of the horse eyes, bridle, nose and edges of the profile using your permanent felt-tip pen. As you can see, this little horse  has a bit of rouge, (idea of Maria del Carmen, a mom of the School). And as last step, you put another chunk of adhesive tape to stick the stick of the dutspan. Finally, in order that it remains well fixed, you finish off the interior and all the parts using the pistol of silicone. Here you have the photos of left profile and right of a pretty horse for the children. Now, it time to play!

miércoles, 7 de febrero de 2018

Reciclar túnica de Ángel para crear disfraz de Reina de las Nieves - Recycling an Angel Tunic to create a costume of Snow Queen

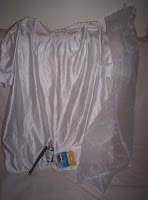
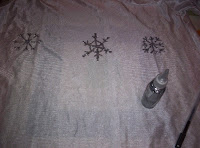
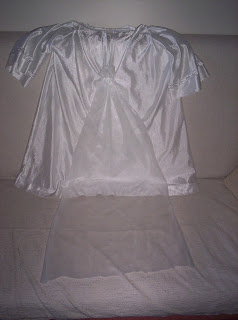
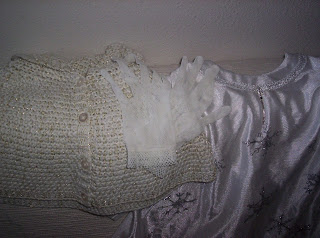
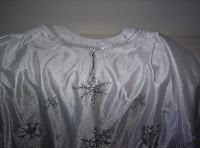
He reciclado una túnica de ángel para crear un disfraz de Reina de las Nieves. Primero, he dibujado en la parte delantera y trasera de la túnica, algunos copos de nieve . Los he pintado encima con pegamento brillante. Después, he cosido un pequeño adorno en la parte delantera. Y en la parte trasera he cosido un velo como adorno. Por último, he completado el conjunto con una capa para cubrir los hombros de punto y unos guantes, ambas prendas son en color blanco.


Rereregreen
Rereregreen


Rereregreen
Rereregreen


Rereregreen
Rereregreen

Rereregreen
Rereregreen


Rereregreen
Rereregreen
Rereregreen
Rereregreen


Rereregreen
Rereregreen

I have recycled an angel tunic to create a costume of Snow Queen. First, I have drawn on the front and back part of the tunic, some snowflakes. I have painted them glitter. Then, I have sewed up a small embellishment on the front side. And on the back side, I have sewn a veil as a thin ornament. Finally, I have completed the set with a cape to cover the shoulders and a pair of gloves, both garments are in white color.

miércoles, 31 de enero de 2018

Reciclar tela de paraguas para crear disfraz de Caperucita Roja - Recycling a fabric from an umbrella to create a Red Riding Hood fancy dress

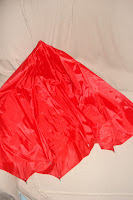
Mi madre ha reciclado una tela que pertenecía a un paraguas de color rojo, para crear un disfraz de Caperucita Roja para mi hija. Mi madre usando esta tela, ha hecho una capa primero y después una capucha. Por último, ha cosido unas cintas rojas para que se pueda atar al cuello. Más tarde, yo he añadido una cesta que nos regaló mi amiga, S., como complemento de este disfraz.
Para mostrar este disfraz de Caperucita Roja, he usado de modelo un peluche grande de vaca de mi hija, ¿qué os parece este disfraz?


Rereregreen
Rereregreen
Rereregreen
Rereregreen


Rereregreen
Rereregreen

My mother has recycled a fabric who belonged to a red umbrella, to create a Red Riding Hood costume for my daughter. My mother using this fabric has made a cape first and then a hood. Finally, she has sewn two pieces of red ribbons so that you can attach to the neck. Later, I have added a basket that gave us my friend, S, as a complement to this fancy dress. 
To show this little Red Riding Hood costume, I have used as model a large cow of my daughter, what do you think of this fancy dress?

domingo, 15 de octubre de 2017

Accesorios para disfraz de Vikingo - Accesories for a Viking costume

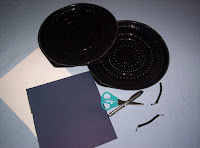
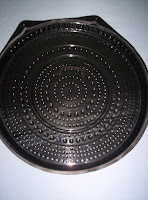
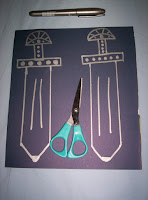
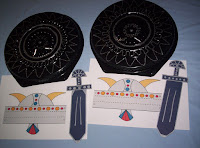
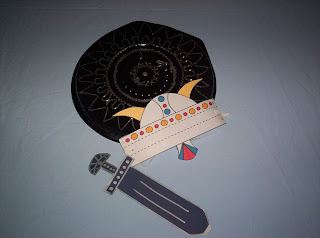
Hace unas semanas realicé unos accesorios para un disfraz de Vikingo de manera rápida reutilizando algunos artículos que tenía en casa. Cómo hice accesorios para dos niños, usé algunos materiales en número doble, es decir: dos bases de plástico de pizza congelada, dos cartulinas azules, un bolígrafo plateado, reutilicé dos gomas elásticas negras con terminaciones metálicas que eran las asas de una bolsa de papel, dos trozos de goma elástica, tijeras y dos cartulinas blancas para imprimir la imagen del casco. Hice un agujero en la base de la pizza, puse la goma elástica blanca, para que fuera el asa del escudo vikingo, luego por el otro lado le pinté unos dibujos usando el bolígrafo plateado. Después, con cartulina doble para que fuera más resistente, pinté, pegué y recorté dos espadas, improvisando el dibujo de las mismas. Imprimí un dibujo de un casco vikingo que encontré en internet y le puse una goma elástica blanca. Aquí, os muestro todo el proceso y el resultado final.


Rereregreen
Rereregreen
Rereregreen
Rereregreen


Rereregreen
Rereregreen

Rereregreen
Rereregreen


Rereregreen
Rereregreen

Rereregreen
Rereregreen


Rereregreen
Rereregreen
Rereregreen
Rereregreen


Rereregreen
Rereregreen


Few weeks ago, I made some accessories for a Viking costume reusing some items, that I had at home of a quick way. I made accessories for two children, then, I used some materials in double number, for example: two bases of plastic of frozen pizza, two blue cardboards, a silver pen, reused two rubber bands black with metallic terminations which ones were handles of a bag paper, two pieces of elastic, a pair of scissors and two white cardboard to print the image of a helmet. I made a hole at the base of the pizza, I put the white rubber band, to be the handle of the Viking shield, then on the other side, I painted some drawing using the silver pen. Then, using a double cardboard to be stronger, I painted, glued and cut two swords, improvising a drawing. I printed a picture of a Viking helmet that I found on the internet and put a white elastic. Here, I show you all the process and the final result.

Translate